physicsmedium
The Unbreakable Egg: An Egg Drop Challenge
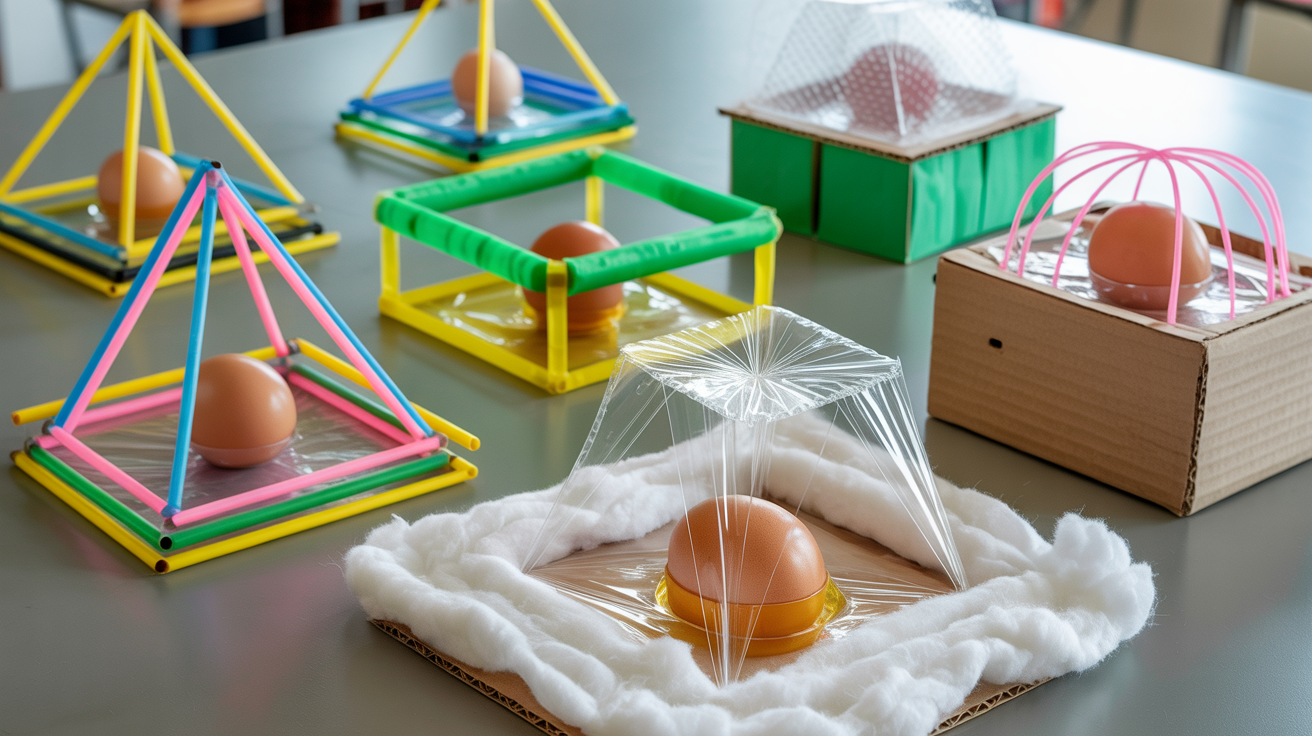
The goal of this project is to design and build a contraption that will prevent a raw egg from breaking when dropped from a significant height. It's a hands-on engineering challenge that teaches important physics principles.
3 days·middle